Preparing a job
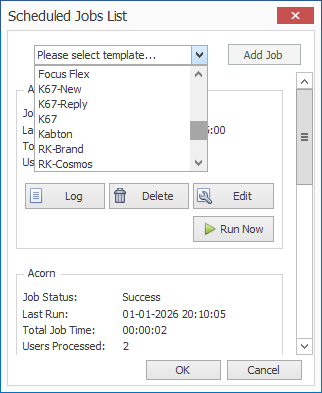
This window is the Job overview. Here you can see what jobs has been defined and there current state.
Only Templates that are deployed is available for jobs.
You can still work with changes in the main store without disturbing the batching, and it is also possible for delegate staff working from other installations to update the template used by DSB services, because it is using the published templates.
Job Parameters
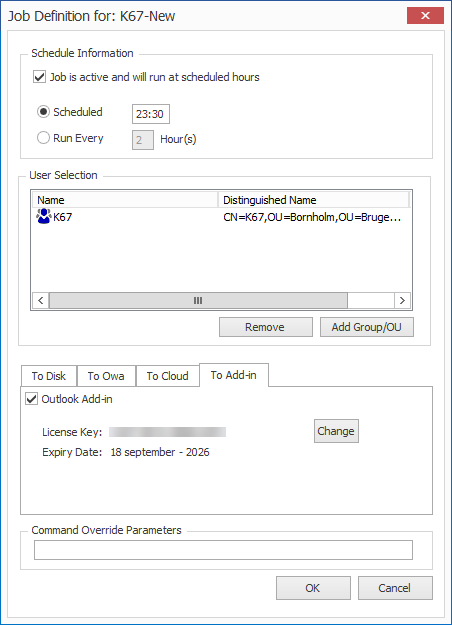
Schedule Information / Timing
If you need to deactivate the whole job for a period that is possible with the “Job active…” checkbox.
Scheduling is either once a day or hourly. Hourly is counting from 12.00 (midday). E.g., Every 3 hour will run at 12.00 - 15.00 – 18.00 etc.
User Selection Scope
You can choose groups or OU’s as target for the signature. Neither is recursive. That is particular important to understand if you use OUs as those are often nested. If you need to target OUs inside you need to add those as well.
To Disk
Will generate signatures for the members of the User selection and put them on your local disk. Go to %ProgramData% to look at the file structure. All generation is default into
C:\ProgramData\DynamicSignature\DS6\Offline
You could share that folder with your users for an easy “Self-service” point.
Custom Location
If you wish to use an existing share, you can also enter the UNC path. Make sure the service has been granted the correct access permissions.
Those are; Every-one: Read, and Network Services: Full Control. Keep in mind that DSBS is running in the "Network Services" context.
To OWA
Pushing signatures onto Exchange On-premises and Office 365 is supported.
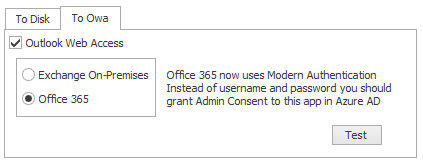
Auto-discovery is a somewhat slow process. Therefore, it will look up the first user and presume ALL other users defined for that job is located on the same installation.
If you have some users on premises and some in the cloud, you must define separate jobs. You cannot define two jobs for the same template. You may have to clone the template.
To Add-in
Using this new feature signatures can be deployed to all major Outlook platforms, including mobile devices.
.png)
Impersonation on Office365
Granting of permissions has transitioned to OAuth2 in the 2.0.0 version of DS Batching Service.
The DSBS service now has an AppID that is registered in AzureAD. When communicating with Office365 it will ask for access token using this AppID.
If you have DS-Manager lower than 6.7.0 you should upgrade to see the new setup dialog.
To setup permissions for DSBS to push signatures onto your Tenant you need to go to AzureAD and then to Enterprise Application. There you can search for “DynamicSignature Cloud Services”
.png)
Search for the DynamicSignature Cloud Services
.png)
Then grant access. That is all you need to do to enable the push to your tenant.
Impersonation setup on-prem
Now open the Impersonation window and fill in the username and password for the account you just created.
Look here to learn how to prepare this account. Both On-Prem and Office365 explained in detail.
You should use the UPN notation because it will contain the domain as well. E.g. batchpush@company.local if you are on-premises.
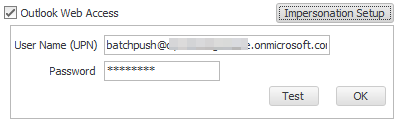
Choose “Test” to bring up another dialog.
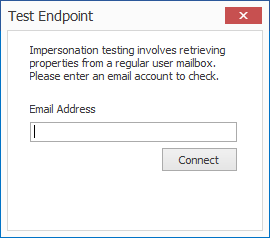
Enter a regular user account with a mailbox. Choose a mailbox that has been used prior to this.
That is to say, a user must have logged on at least once, and answered the language / time zone questions. Make sure the test pass.